
mPower Liquor Store POS Screen Layout
When you are shopping for a POS, you want to know what your cashiers will actually be looking at all day. This post breaks down the look and feel of the mPower point of sale interface, screen by screen.
There is a lot on the screen, but don’t be intimidated! Everything has a home, and most cashiers get the hang of it in 10 minutes or less.
POS Screen Overview
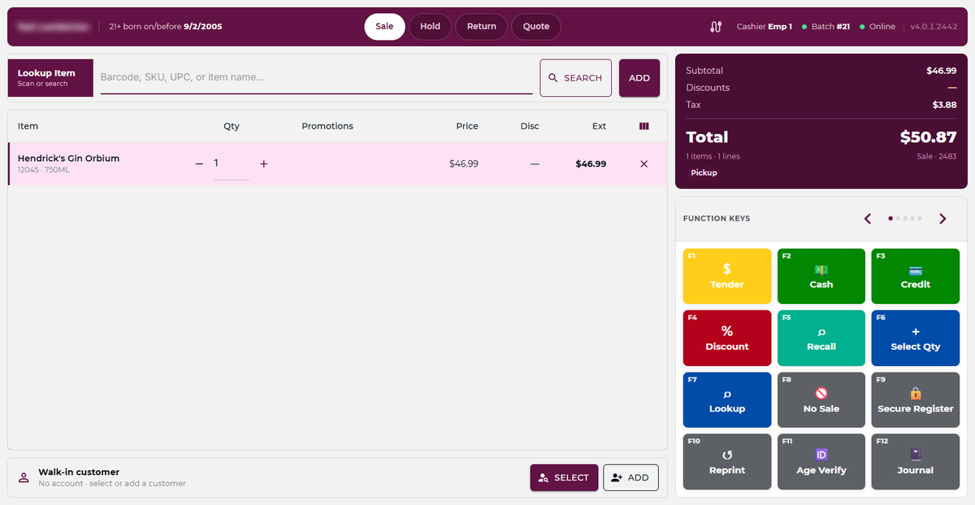
The register is laid out in three parts. Your transaction fills the left-hand side, your totals and function keys sit on the right, and the customer bar runs along the bottom. Once your team knows those three zones, they always know where to look.
The Top Bar: Store, Age Check, and Transaction Type
Across the top you will find your store and register, and right beside it the age check your cashiers need most: the 21+ birth date cutoff, calculated for today. No mental math at the counter, and no guessing when someone hands over a license.
In the middle are your transaction types — Sale, Hold, Return, and Quote. They are tabs now, so switching from a sale to a return is one tap and your cashier can see at a glance which kind of transaction they are in.
Over on the right you get the housekeeping details: which cashier is signed in, the current batch number, and a connection indicator showing whether the register is online. That last one matters. If your internet drops, your team can see it on the register instead of finding out at the end of the night.

Ringing Up Items
Scanning is the fastest way in, but the Lookup Item bar also takes a barcode, SKU, UPC, or just part of an item name — handy when a label will not scan or a customer is describing a bottle they cannot remember the name of.
Each line shows the item name with its SKU and size underneath, the quantity, any promotions attached to it, the price, the discount, and the extended total. Quantity has plus and minus buttons, so bumping a customer from one bottle to two does not mean retyping anything. Every line has an X to remove it if something goes on by mistake.
Want different columns? The column picker at the end of the header row lets you show more or fewer, so you can set the grid up around what your store actually sells.

Totals at a Glance
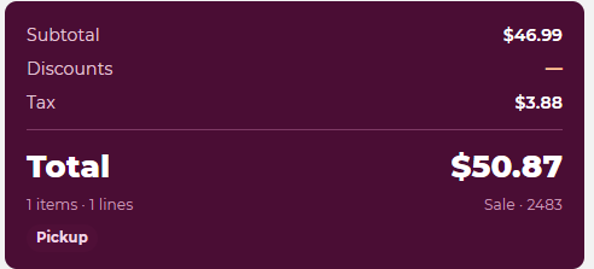
Totals live at the top right, where both your cashier and your customer can see them building through the sale: subtotal, discounts, tax, and the total in large type.
Underneath it you get the details that settle questions before they turn into disputes — the item and line counts, the transaction number, and the fulfillment method when the sale is a pickup rather than something walking out the door.
POS Function (aka Hot) Keys
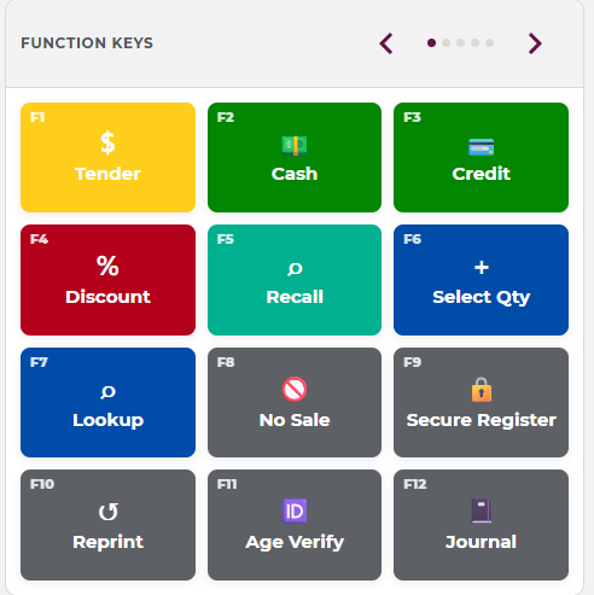
Below the totals sit the function keys, F1 through F12, with five pages you can move through using the arrows. That is room for plenty of shortcuts without burying the ones your team reaches for every hour.
The common ones are right on the first page: Tender, Cash, Credit, Discount, Recall, Select Qty, Lookup, No Sale, Secure Register, Reprint, Age Verify, and Journal. They are color coded and each one carries an icon, so cashiers learn them by shape and color rather than by reading every label.
The keys are yours to arrange. Put the ones your store uses on the first page, and give your cashiers access only to the ones they should have. Stores that sell ice, lottery, or handle payouts can have keys for those too.
Adding a Customer to the Sale
Along the bottom of the screen is the customer bar. A sale starts as a walk-in, and your cashier can select an existing customer or add a new one right there without leaving the transaction.
That is how a regular’s purchase history, account, and loyalty follow them from one visit to the next — and it is a two second step at the counter rather than a chore for later.

Conclusion
That is a quick tour of how the mPower liquor store POS software looks and works. To see the point of sale in action and get your questions answered by someone who knows beverage retail, reach out to our sales team by clicking here.
BONUS! Our POS is touchscreen compatible, so the same screen works on a counter terminal or a touchscreen.
Additional mPower POS Blogs
- Why Choose mPower Liquor POS System?
- Make Your Sales Process Faster with mPower Liquor POS
- Tracking Coupon Promotions in mPower Liquor POS
- mPower Makes Liquor Store’s Physical Inventory Counts Easier
- Utilizing The Right Click Option in mPower Beverage
- Simplify Your Liquor Store’s E-Commerce with mPower Beverage